In this tutorial, I show you how to make lined paper in Google Docs easily. You can create a horizontally lined paper on Google docs with this method.
Google Docs is also called Google Documents. It is the popular document creator and editor platform offered by Google. It can be accessed through an internet browser. Moreover, the mobile application is also available for Android users. Google Docs helps users to create and edit documents online for free. Today, I am going to share a method on how to make lined paper on Google Docs.
If you want to save your precious time then, you can also use the ready-made lined paper Google Docs templates.
How to Make Lined Paper in Google Docs
You don’t need to download any template to create lined paper. All you need to do is complete the following steps to do this job.
1. Sign in to your Gmail account then Go to the following URL https://www.google.com/docs/about/.
2. Then you have to click Go to Google Docs.
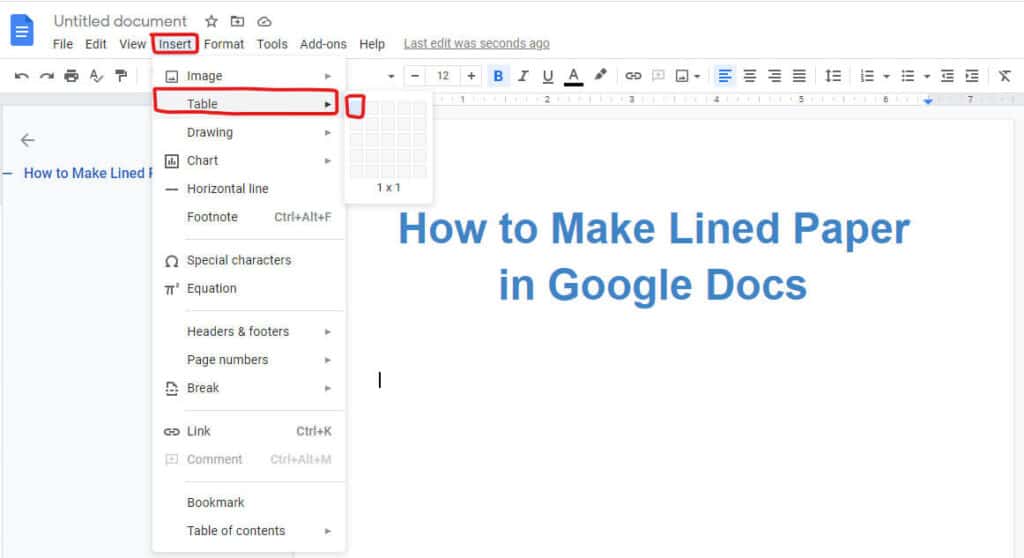
3. Click Insert > Table then select only a single box (1×1).
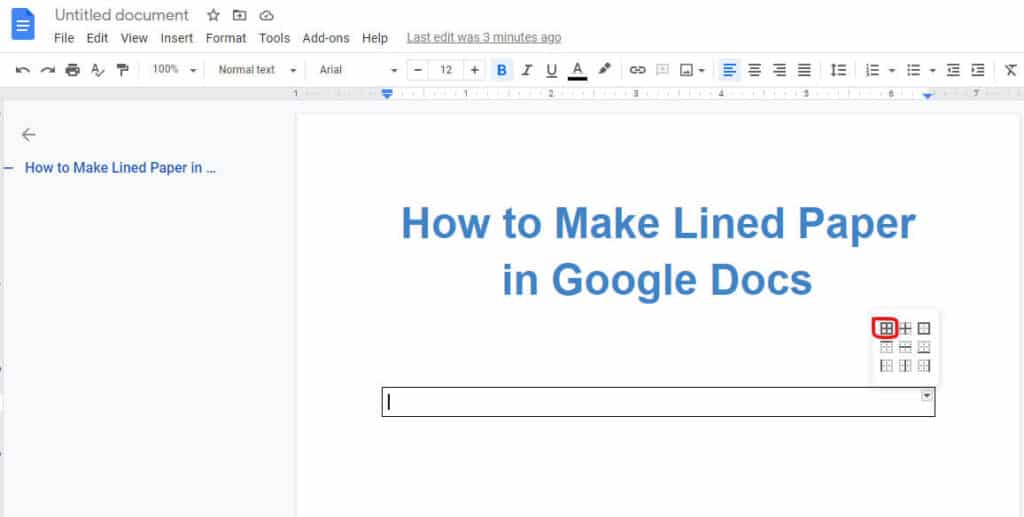
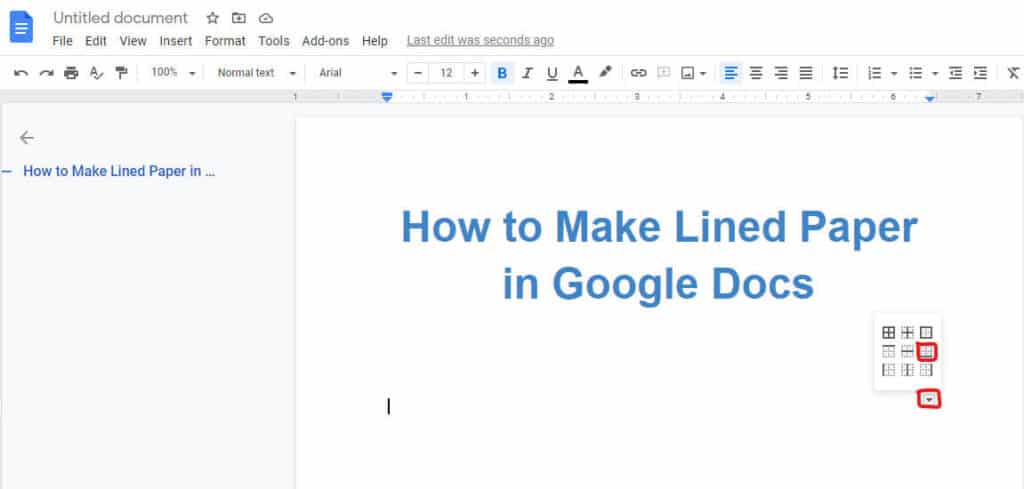
4. Here you have to click on the triangle option and select all borders.
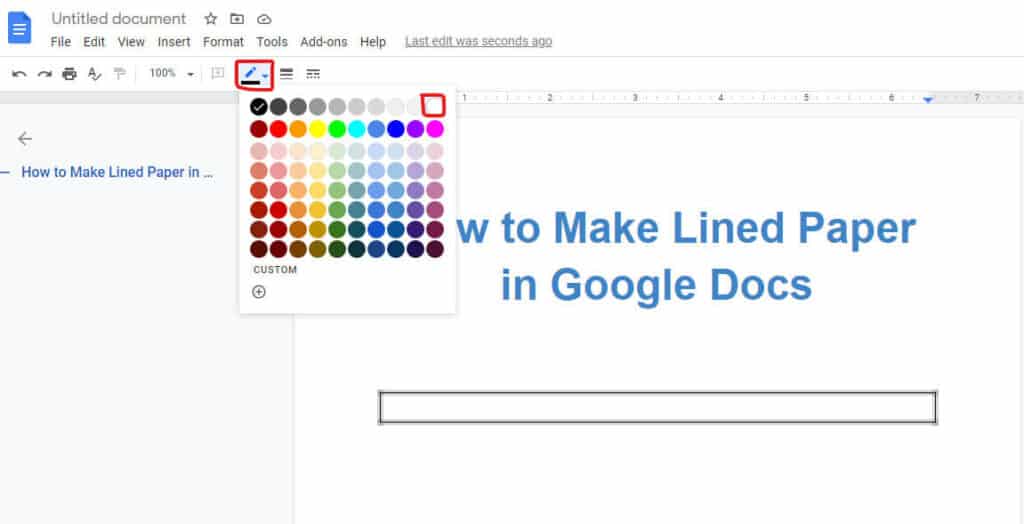
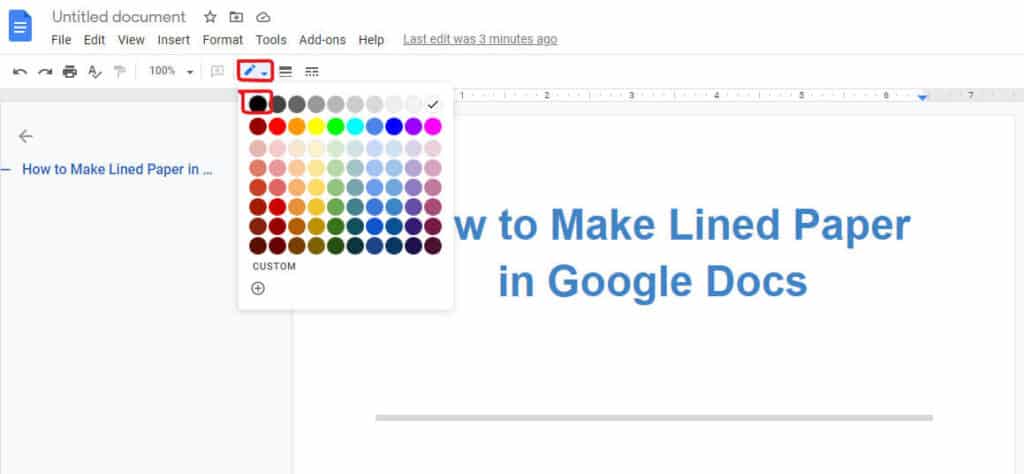
5. Go to the Border color and choose White.
6. Once again click the triangle option and select the bottom border.
7. Go to the Border Color and now select Black.
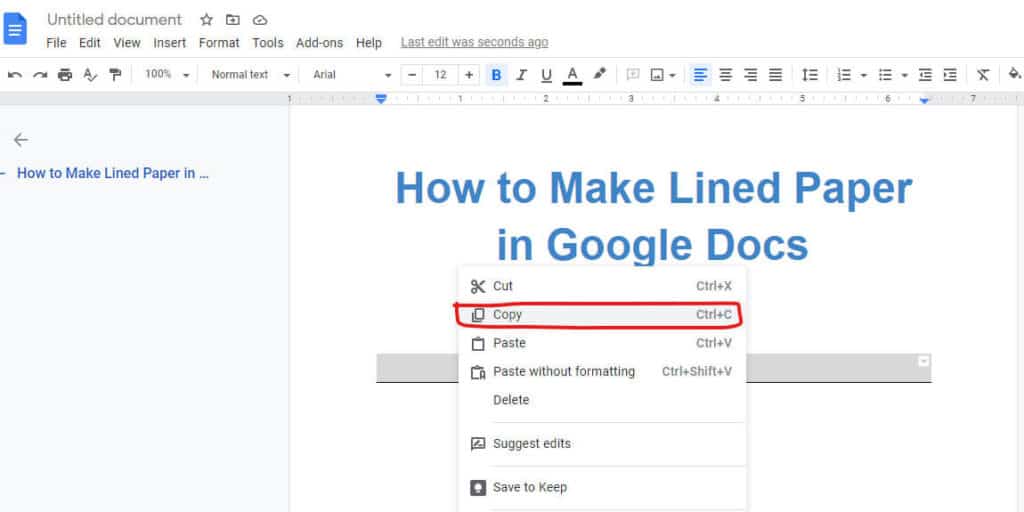
8. Select Line, copy it and paste it to the whole page.
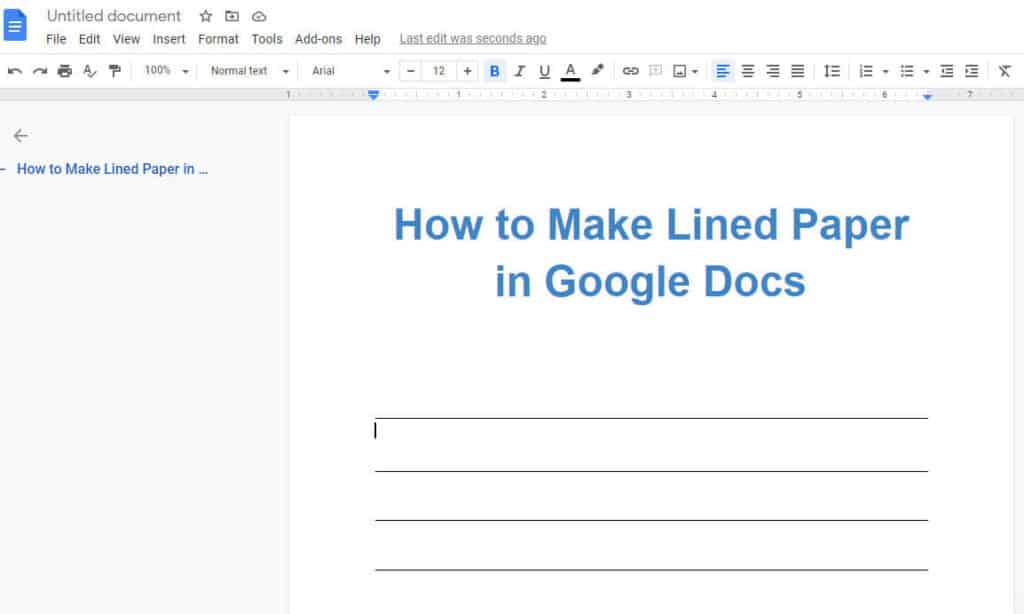
9. Select all Lines then navigate to the Font Size and select the size as per your requirement (I selected Font Size 1).
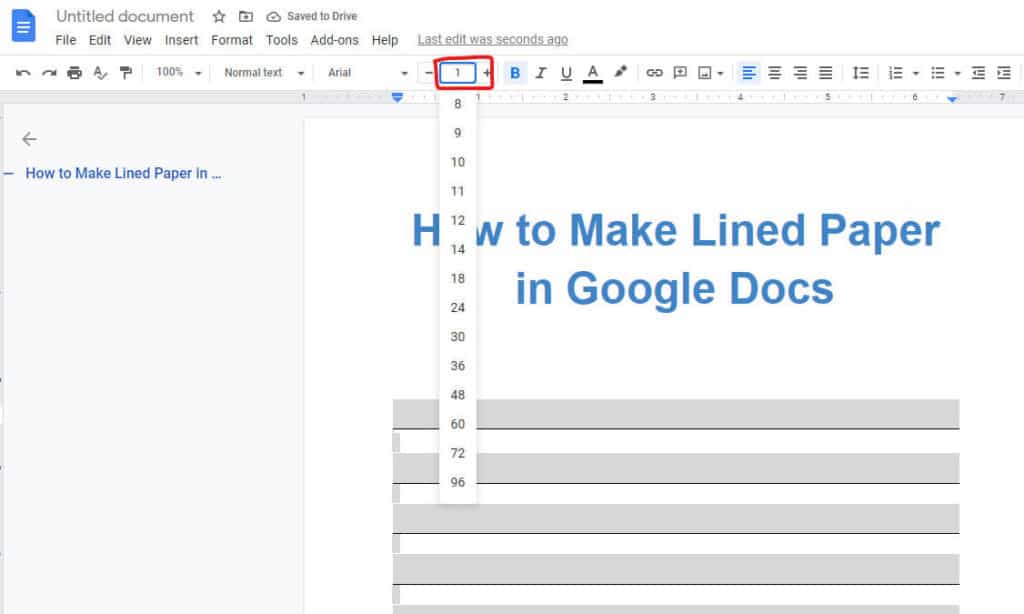
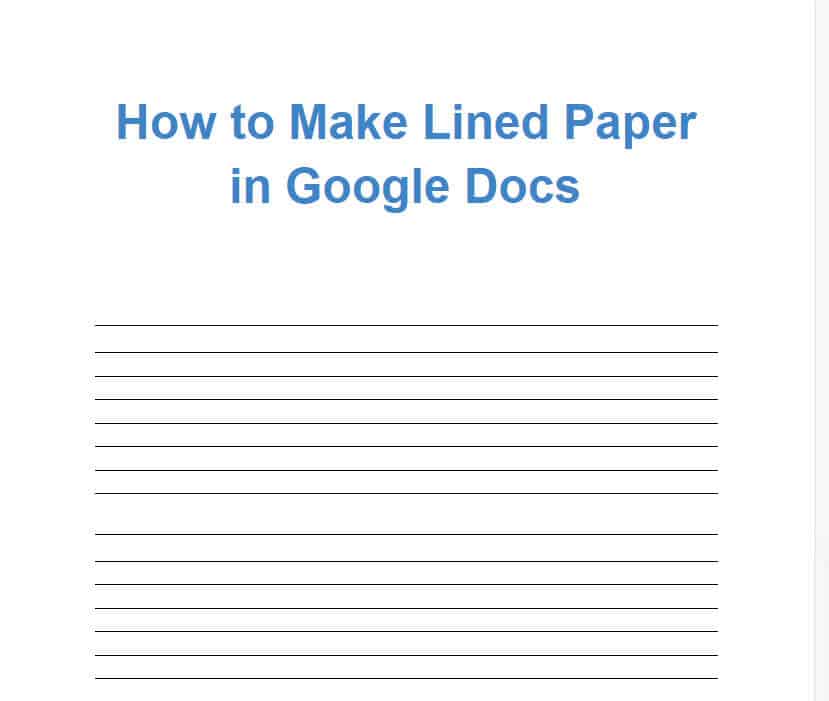
10. You have successfully created lined paper in Google Documents.
Conclusion
I hope you liked this tutorial on how to make lined paper in Google Docs. You can easily create lined paper without any template using this method.
You can subscribe to my YouTube Channel for useful Video Tutorials. Moreover, You can also find us on Twitter and Facebook.
very helpful, thanks!
But it isn’t as helpful, since when the writing goes to another line, the lines just move down. It would be helpful if I didn’t want to type on the lines but yeah.